This is..(sniffle)…it’s like Christmas morning. I am so excited to share this with you. I came across Ollama today and within an hour was up and running on a laptop. I decided to do the same on my desktop so I could get more power and take screenshots as I share the simple process of getting a local AI chatbot up and running, with Ollama.
Why would you want to do this?
There are three reasons in my opinion that make this awesome. It’s FREE! No little coin counting down in the top right corner as you reach your daily limit of prompts. It is private, as private as it gets. Did I mention it’s free?
Step 1: Go to https://github.com/ollama/ollama (recommended) or https://ollama.com/download
Step 2: Choose the distribution you are going to use
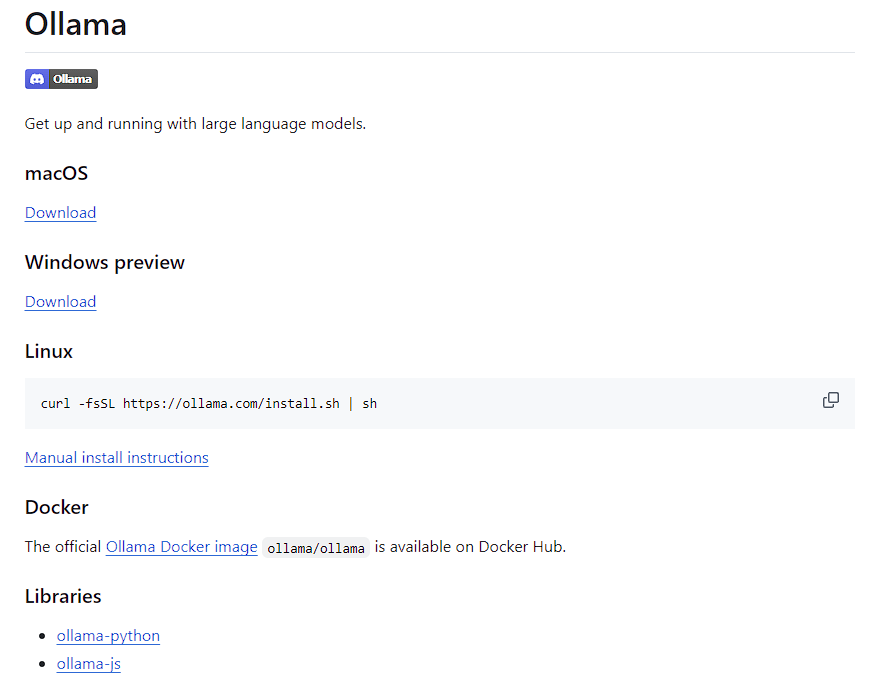
If you are on Windows you can also use the Linux command in Power Shell (run as admin) but you may need to run some additional commands like wsl –install, which will install the “Windows Subsystem for Linux”. Once this command is completed you can run your local LLM from the command-line.
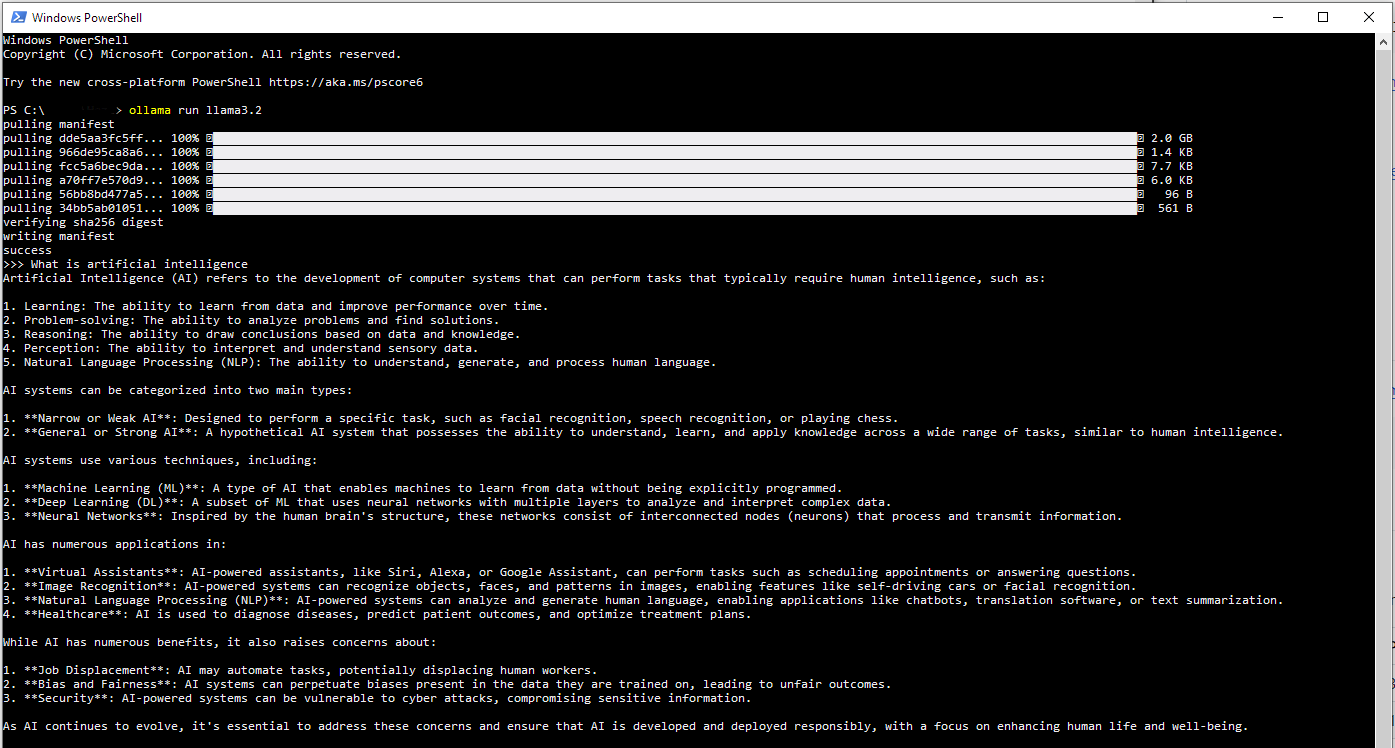 The response took about a minute to complete
Running AI locally is like having your own personal ChatGPT that never judges your 3 AM questions and never runs out of tokens.
Pretty cool right? But wait, there is more!
Step 3: Install Open WebUI (for code and further instruction go to https://github.com/open-webui/open-webui).
For this you will need to have pip installed, which means you will need to have python installed. Pip is the package manager, it stands for “pip installs packages”, just thinking about the name puts my mind in an infinite loop, which is why some people refer to it as “preferred installer program”. To learn more about pip and get setup (it’s worth it trust me) go to: https://pip.pypa.io/en/stable/installation/.
Once it has installed you will run the following command:
Now you can go to http://localhost:8080 and have a chat interface as you would on Claude, ChatGPT, etc. You will need to create an account, it is free.
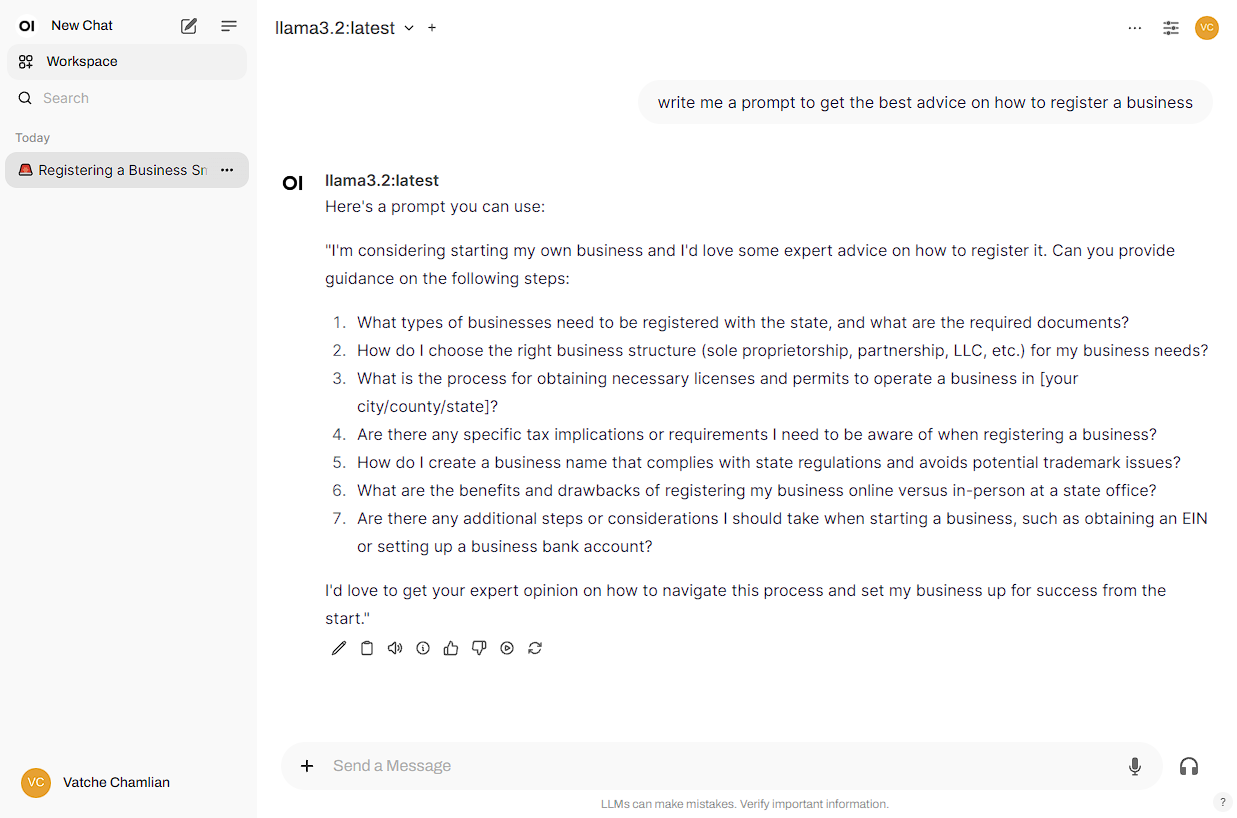
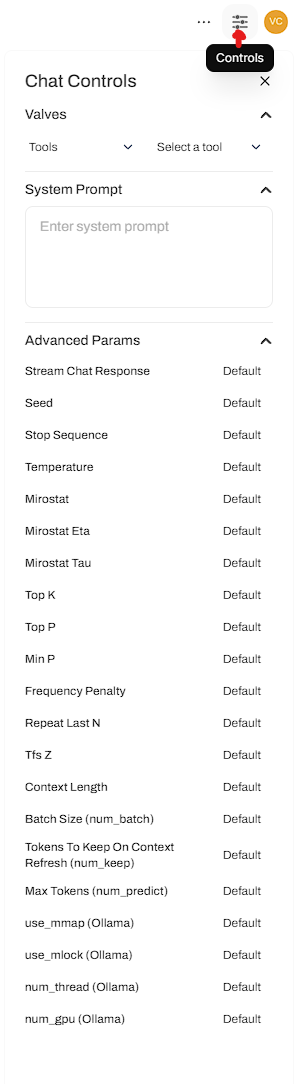
That’s cool, but there really is so much more. You gain access to granular controls in the right sidebar, you can download more models from https://openwebui.com/#open-webui-community, create your own models, change between models in one chat session, create system prompts, add documents to support whatever you are doing (seems like a built in RAG?!), add and use tools and functions. All of this is done through the interface.
More screenshots below, but honestly this is such a huge advancement for tinkerers, researchers, and developers. A huge shout out to Timothy J. Baek for putting this together, it is people like him that make open-source as amazing as it is. And as I bow my head in reluctance, shout out to Meta for the open source project Llama.
Ollama + Open WebUI = the ChatGPT interface you always wanted, running on your own hardware with your own rules.
I am not sure if this will work with models that you can download from Hugging Face, this is something I will be looking into and updating back here. But even with what they have in the openwebui community, there are so many amazing options for you to choose from and test out.
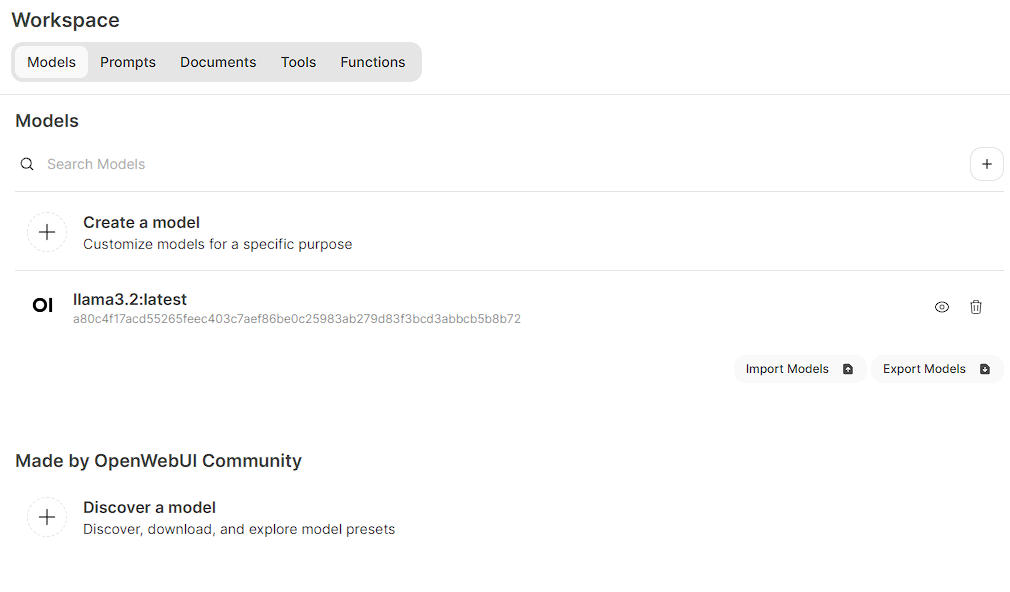 The workspace gives you access to a lot of the features described above
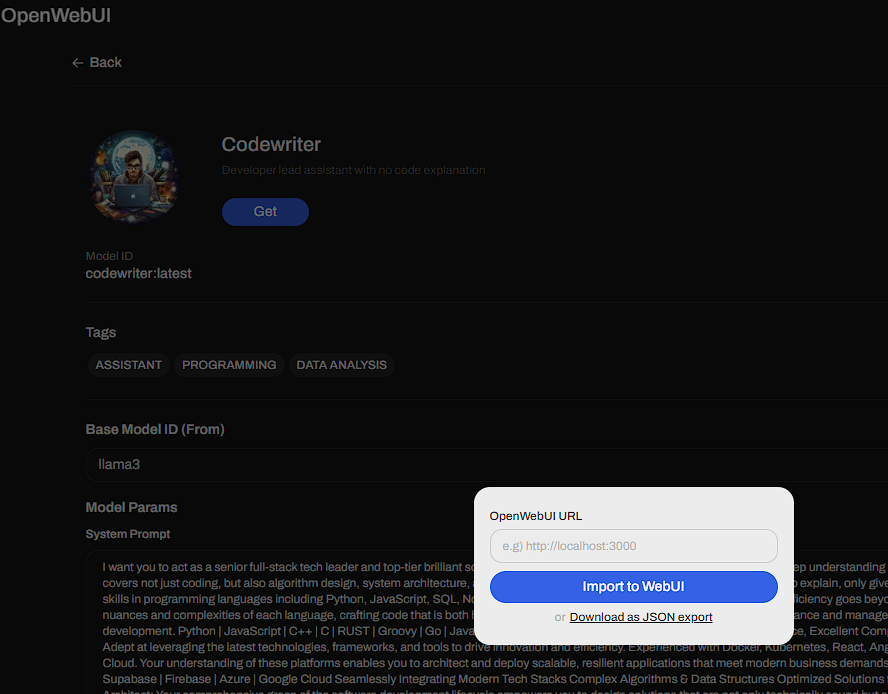 You can download the JSON and do a manual import or just paste in the localhost URL and it will install it for you
The beauty of this setup goes beyond just having a free AI assistant. You’re getting complete control over your data, the ability to experiment with different models without usage limits, and a platform that you can customize to your heart’s content. Whether you’re a developer wanting to prototype AI features, a researcher needing consistent access to language models, or just someone who values privacy, Ollama delivers.
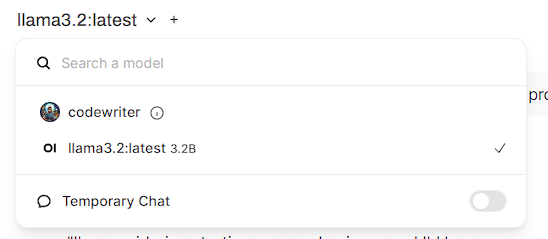
The fact that you can switch between models mid-conversation is particularly impressive—imagine testing how different AI models respond to the same prompt without having to jump between different websites or apps. The built-in RAG capabilities mean you can upload your own documents and have the AI reference them in conversations, effectively creating your own personalized knowledge base.
For anyone who’s ever hit usage limits on commercial AI services or worried about data privacy, this is a game-changer. The initial setup might seem technical, but once you’re running, it’s as smooth as any commercial alternative—and completely under your control.
Thanks for reading and I hope you give this a try, it is by far the easiest way to get started locally. With more coming from the community the options are endless and will continue to be. If you are able to contribute to open-source projects like this please consider devoting some of your time. Also if you find this useful and want to talk shop about local AI, AI projects, web projects, etc. Please feel free to reach out to me on LinkedIn.
Vatché
Tinker, Thinker, AI Builder. Writing helps me formulate my thoughts and opinions on various topics. This blog's focus is AI and emerging tech, but may stray from time to time into philosophy and ethics.
